Imprivata Appliance Security Settings
Use the Security page in the Imprivata Appliance Console to manage SSL certificates and to configure automatic notification of abnormal requests made to the web server.
The SSL Tab
Use the SSL tab to view, edit, download, import, and recreate the self-signed SSL certificate for the Imprivata appliance. This certificate can reference a list of certificates in a chain of trust. The appliance creates a self-signed SSL certificate during installation. When you initially view the SSL tab, the information from the self-signed certificate opens.
Editing the Current Certificate Information
To edit the information for the current certificate:
-
Click Edit. A window opens where you can enter the new information.
-
Enter the new information.
-
Click Recreate Self Signed Certs. A notice appears informing you to restart the appliance.
-
Click OK. You return to the SSL tab, with a notice that the information has changed. Changes are not reflected in the certificate until the appliance is restarted.
Replacing the Self-Signed Certificate
The Best Practice for trusting the Imprivata web SSL certificate is to generate a new certificate signed by your trusted Enterprise Certificate Authority (CA). The CA can be internal, such as an Active Directory domain controller running Certificate Services, or external, such as VeriSign or DigiCert. The key requirement is that the CA certificate is trusted, meaning that it is already contained within one of the trusted CA certificate stores on Imprivata endpoint computers.
If the certificate on an Imprivata appliance references a list of one or more certificates signed by an intermediate CA in a chain of trust, then the trusted CA certificate stores on Linux-based or Windows-based endpoint computers with the ProveID Embedded agent can contain only the root certificate in that chain of trust, without the intermediate certificate(s).
The process to generate a new certificate involves generating a Certificate Signing Request (CSR) on the Imprivata appliance, submitting this CSR to a CA, which creates and signs the requested certificate, then importing the new certificate into the Imprivata appliance. The certificate can be base 64 encoded (PEM) or binary encoded (DER) and can reference a list of certificates in a chain of trust.
-
Access your Microsoft Enterprise Root Certificate Authority website, which has URL format:
http://<hostname>/CertSrv. -
Click Request a certificate.
-
Click advanced certificate request.
-
Paste either a base-64-encoded CMC or PKCS #10 certificate request or a base-64-encoded PKCS #7 renewal request in the Saved Request box:
-
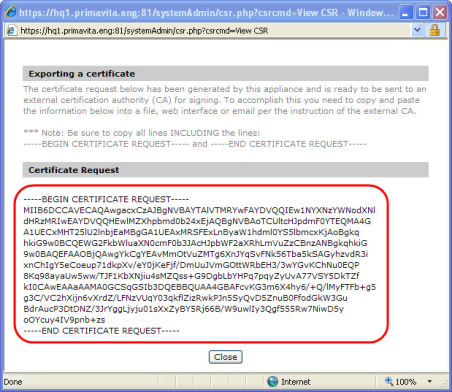
Log into the Imprivata Appliance Console. On the Security page > SSL tab, click View CSR to open a window with the text needed for the certificate request.
-
Copy all the text below the Certificate Request line, including both -----BEGIN CERTIFICATE REQUEST----- and -----END CERTIFICATE REQUEST-----.
-
-
Paste the Certificate Request into the Saved Request box.
-
-
Select Web Server from the Certificate Template drop-down list. Click Submit. The Certificate Issued page appears.
-
Select either DER encoded or Base 64 encoded format.
-
Click either Download certificate or Download certificate chain.
Imprivata recommends downloading a certificate chain. -
Locate the downloaded certificate file. Example file names are certnew.cer for a certificate file and certnew.p7b for a certificate chain file.
-
In the Imprivata Appliance Console, go to the Security page > SSL tab and click Import Cert.
-
In Importing a certificate chain, click Choose File and then navigate to the new certificate file and select it.
-
When the import is done, restart the appliance.
-
Log into the Imprivata Appliance Console. Go to the Security page > SSL tab and review the Issuer (CA) field value to make sure the name corresponds with the CA that signed the Imprivata appliance CSR. When the Imprivata appliance's certificate is self-signed, the issuer appears as "Imprivata Appliance."
-
Repeat steps 1-11 for each appliance in your enterprise to ensure that each appliance has a trusted certificate issued by the Trusted Root Certification Authority.
-
Log into the Imprivata Appliance Console. On the Security page > SSL tab, click View CSR to open a window with the text needed for the certificate request.
-
Copy all the text below the Certificate Request line, including both -----BEGIN CERTIFICATE REQUEST----- and -----END CERTIFICATE REQUEST-----.
-
-
Use your CA software to submit the CSR to request a new certificate or certificate chain. Imprivata recommends requesting a certificate chain. When the CSR is approved you should receive a file containing the new certificate or certificate chain.
-
Log into the Imprivata Appliance Console. On the Security page > SSL tab, click Import Cert.
-
In Importing a certificate chain, click Choose File. Navigate to your new certificate file or certificate chain file and select it.
-
When the upload is done, restart the appliance.
-
Repeat this procedure for each appliance in the enterprise.
The Intrusion Detection Tab
The Intrusion Detection tab lets you configure email notifications of suspicious activity on the appliance or in Imprivata software applications. You can also configure email alerts for login failures, and set automatic account disablement following a preset number of login failures.
The following options are available on the Security page.
-
Suspicious Activity Email Alerts — If enabled, lets you send email to the appliance Administrator or Imprivata OneSign application if suspicious activity is detected.
-
Login Failures — Specify how many consecutive bad login attempts to the Imprivata Admin Console and the Imprivata Appliance Console are allowed. If maximum attempts is reached, login is disabled and an email alert can be sent to the appliance Administrator. You can disable this feature completely by setting it to 0.
-
Send Email Alert — If enabled, the appliance Administrator receives an email alert if the maximum number of attempts is reached by a user trying to access the system. See Email Settings for setting email addresses for alerts.
-
Disable Account — If enabled, the user is unable to login for 5 minutes after reaching the maximum allowed login attempts.