Enabling Integration with your Medical Devices
Imprivata Medical Device Access enables fast, secure authentication for accessing and transacting with patient information on medical devices.
Integrate Imprivata with your medical devices to enable strong authentication for transacting with patient information:
Configure Users
See Planning an Imprivata Enterprise Access Management for MFA Implementation before completing the steps on this page.
Complete the steps in the following sections to get medical device users up and running.
Synchronize to a User Directory
NOTE: You do not need to perform this step if you are already using the same user directory for another Imprivata product.
The Imprivata user database is a mirror of the user directories in all domains from which you create user accounts. When you first install Imprivata Enterprise Access Management, there are no user accounts in place. To set up the Imprivata user database, you synchronize with the user directories in which your users’ primary accounts are located. See Adding a Network Domain
(Optional) Set Up Administrator Roles
Enterprise Access Management uses administrator roles and sub-administrator roles with nested scope so you can delegate administrative authority throughout the enterprise. Administrator roles help delegate Enterprise Access Management administration operations throughout an enterprise. See Administrator Roles (Delegated Administration)
Create and Assign User Policies
User policies are associated with MFA workflow policies. Before enrolling Enterprise Access Management users:
- Create a user policy that is assigned only to providers who are authorized to access an Imprivata-integrated medical device.
- For example, you can create a user policy called Medical Device Users and then assign it to each user who is authorized access a medical device.
See Creating and Managing User Policies for information about configuring user policies.
Configure Workflows
The MFA workflow policy controls:
-
The authentication methods that are allowed for each workflow, and
-
The clinicians who are allowed to use each associated workflow.
Configuring the MFA workflow policy involves:
-
Specifying the authentication method(s) required to complete each workflow, and
-
Associating at least one user policy with each workflow.
After a user policy is associated with a workflow, all users to which the user policy is assigned are allowed to:
-
Enroll the authentication methods specified in the policy, and
-
Use the workflow.
The following table lists and describes each workflow that requires authentication via Enterprise Access Management. Your applications may not support all available workflows.
| Workflow Name in the MFA Workflow Policy | Applicable Users | Regulations | Allowed Authentication Methods (first factor plus second factor, if so specified) | License Required |
|---|---|---|---|---|
| User verification (non-regulated) |
Users who perform streamlined workflows from integrated mobile computing carts and medication dispensing carts and cabinets.
|
None |
All‡ |
Medical Device Access |
| Medical device log in | Clinicians who log into integrated medical devices with proximity or fingerprint. | None |
All‡ |
Medical Device Access |
| Medical device log in — password only |
Clinicians who manually log into an integrated medical device with username and password only. Other authentication methods are not supported. |
Does not require a Medical Device Access license | ||
| Medical device different user authentication | Clinicians who perform a witness workflow on a medical device | None | All‡ | Medical Device Access |
| Medical device user verification (non-regulated) | Clinicians who require authentication during a clinical workflow on a medical device | None | All‡ | Medical Device Access |
Workflows are configured on the MFA workflow policy page of the Imprivata Admin Console (Users menu > Workflow Policy). Some workflows can have more than one allowed authentication method.
You can remove authentication methods that you don't want to use, or you may be prompted to remove certain authentication methods if they are not allowed by the regulations of the state you selected at the top of the page. Invalid methods are highlighted in yellow and a notification message appears at the top of the MFA workflow policy page.
You need to associate a user policy (or policies) with each MFA workflow you intend to use. After a user policy is associated with a signing workflow, all users in that user policy are allowed to perform that MFA workflow with the specified authentication methods.
To associate a user policy with an Enterprise Access Management MFA signing workflow:
- Click Associate user policies to the right of the workflow on the MFA workflow policy page. The Choose a user policy box appears.
-

- Click in the box to view a drop-down list of available user policies, or begin typing to search for the user policy you want to associate.
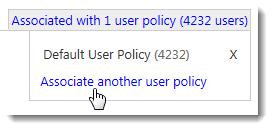
- Select the user policy you want to associate. The Associate user policies link changes to Associated with 1 user policy and displays the total number of users contained within the associated user policy.
- To associate another user policy, click Associate another user policy.
-
- Repeat these steps for each workflow that your organization uses.
You may improve the user experience by providing a grace period where Enterprise Access Management MFA skips second factor authentication:
-
In the Imprivata Admin Console, go to Users > Workflow policy.
-
In the section Workflow options, set a grace period (24 hours, 59 minutes maximum), where a user does not have to complete second factor authentication after proximity card authentication and/or fingerprint authentication.
-
Click Save.
Configure Endpoint Computers
The following sections describe how to configure the endpoint computers and/or virtual desktops on which Enterprise Access Management enrollment and/or workflows will occur.
Create and Assign Computer Policies
Computer policies set security parameters for each computer in your organization. Each computer must be assigned one computer policy. See Creating and Managing Computer Policies
Deploy the Imprivata Agent to Endpoints
IMPORTANT: Perform all previous configuration steps listed in Installing and Configuring Enterprise Access Management for MFA before performing this step. Enterprise Access Management features do not "go live" on your users' endpoint computers until the Imprivata agent is deployed.
An Imprivata agent must be installed on each endpoint computer on which MFA enrollment or workflows will take place.
Imprivata provides a variety of agents for different uses. It is important to understand the differences between the agent types to be sure you employ the agent best suited to each user. See Different Imprivata Agents for Different Uses.
You can distribute the Imprivata agent with Microsoft Active Directory (AD) group policy or similar tools, or you can email users a link and have them self-install it. You configure these settings on the Deploy agents page (Computers menu > Deploy agents). See Deploying the Agent.
Connect Authentication Devices
Connect the required authentication devices on each endpoint computer on which MFA enrollment and/or workflows will take place and make sure the devices are working properly.
Configure Medical Device Integration
Configure the integration between Imprivata Enterprise Access Management and your Medical Devices to support authentication via MFA.
NOTE: Before you begin, see Enterprise Access Management MFA Supported Components for the supported versions of your medical device software.
After the Imprivata agent and the administration tools have been installed, run MedCartAgentConfig.exe as Administrator. If this tool is launched from a Capsa CareLink endpoint that has the Imprivata agent installed, the current agent settings will be loaded and any changes saved will take effect immediately. Otherwise, a default set of values are loaded. Deploy the saved configuration file to the Capsa CareLink endpoints.
The configuration settings for the agent are stored in a file MedCartAgent.exe.config. This file can be deployed to other computers by storing it in the same directory as MedCartAgent.exe.
Configure Medical Device Workflow
-
In the Imprivata Admin Console, go to Users > Workflow Policy.
- In the section Medical Device workflows:
Select the appropriate authentication methods for the User verification (non-regulated) workflow;
To enable users, associate their user policies with this workflow.
- For details on configuring workflows, see Configuring the Enterprise Access Management Workflow Policy.
-
Click Save.
Enable API Access
This medical device integration requires full access to the Imprivata ProveID Web API:
-
In the Imprivata Admin Console, go to the gear icon > API Access.
-
On the API Access page, select Allow full API access via ProveID Web API and ProveID Embedded
-
Click Save.
This medical device integration requires full access to the Imprivata ProveID Web API:
-
In the Imprivata Admin Console, go to the gear icon > API Access.
-
On the API Access page, select Allow full API access via ProveID Web API and ProveID Embedded
-
Click Save.
To complete the integration with Capsule SmartLinx MDIS, see the SmartLinx MDIS System Administrator’s Guide and complete the following steps:
- Validate that the devices are supported and have the appropriate RFID proximity reader kit installed;
- Install the Imprivata appliance root certificate to the SmartLinx server;
- Configure the CapsuleTech SmartLinx MDIS server registry to connect to the Imprivata appliance.
Configure Medical Device Workflow
- In the Imprivata Admin Console, go to Users > Workflow Policy.
- In the section Medical Device workflows:
- Select the appropriate authentication methods for the User verification (non-regulated) workflow;
- To enable users, associate their user policies with this workflow.
- For details on configuring workflows, see Configuring the Enterprise Access Management Workflow Policy.
- Click Save.
Add Capsule SmartLinx MDIS integration
- In the Imprivata Admin Console, go to Applications > EPCS and clinical workflows integrations.
- In the Medical Devices section, click Add a medical device.
- Select Capsule SmartLinx MDIS and click OK.
Add GE Healthcare — Venue Ultrasound integration:
-
In the Imprivata Admin Console, go to Applications > EPCS and clinical workflows integrations.
-
In the Medical Devices section, click Add a medical device.
-
Select GE Healthcare — Venue Ultrasound and click OK.
Enable API Access
This medical device integration requires full access to the Imprivata ProveID Web API:
-
In the Imprivata Admin Console, go to the gear icon > API Access.
-
On the API Access page, select Allow full API access via ProveID Web API and ProveID Embedded
-
Click Save.
Configure Medical Device Workflows
Select the authentication method(s) available for medical devices:
-
In the Imprivata Admin Console, go to Users > Workflow Policy.
- In the section Medical Device workflows:
Configure authentication methods required for the Log in workflow;
Associate user policies with the workflow.
- For details on configuring workflows, see Configuring the Enterprise Access Management Workflow Policy.
-
Click Save.
To complete the integration with GE Healthcare — Venue Ultrasound, see the GE Healthcare documentation:
- Validate that the devices are supported and have the appropriate RFID proximity reader kit installed;
- Install the Imprivata appliance root certificate to the server;
- Configure the server registry to connect to the Imprivata appliance.
GE Healthcare — Venue Ultrasound supports RFID reader programming. When you assign your GE Healthcare — Venue Ultrasound devices to an Enterprise Access Management computer policy, reconcile the card reader configuration settings with the card readers for those devices.
See the Imprivata Enterprise Access Management MFA Supported Components for details on specific requirements for enabling this integration and for supported functionality and authentication methods.
Enable API Access
This medical device integration requires full access to the Imprivata ProveID Web API:
-
In the Imprivata Admin Console, go to the gear icon > API Access.
-
On the API Access page, select Allow full API access via ProveID Web API and ProveID Embedded
-
Click Save.
Full API access is also acceptable, but not required, for this vendor.
Add the Masimo Integration
-
In the Imprivata Admin Console, go to Devices > Integrations.
-
In the Medical Devices section, click Add a medical device.
-
Select Masimo IRIS Platform and click OK.
Configure Medical Device Workflows
-
In the Imprivata Admin Console, go to Users > Workflow Policy.
-
In the section for Medical device workflows:
-
Configure desired authentication methods required for the Log in workflow;
-
Associate user policies with the workflow. For details on configuring workflows, see Configuring the Enterprise Access Management Workflow Policy.
-
-
Click Save.
Configure the Masimo SafetyNet Server for Imprivata Authentication
Contact your Masimo representative for assistance with configuring Masimo SafetyNet for use with Imprivata authentication.
See the Imprivata Enterprise Access Management MFA Supported Components for details on specific requirements for enabling this integration and for supported functionality and authentication methods.
Enable API Access
This medical device integration requires full access to the Imprivata ProveID Web API:
-
In the Imprivata Admin Console, go to the gear icon > API Access.
-
On the API Access page, select Allow full API access via ProveID Web API and ProveID Embedded
-
Click Save.
Add the Mindray Integration
-
In the Imprivata Admin Console, go to Devices > Integrations.
-
In the Medical Devices section, click Add a medical device.
-
Select Mindray BeneVision DMS and click OK.
Configure Medical Device Workflows
-
In the Imprivata Admin Console, go to Users > Workflow Policy.
-
In the section for Medical device workflows:
-
Configure desired authentication methods required for the Log in workflow;
-
Associate user policies with the workflow. For details on configuring workflows, see Configuring the Enterprise Access Management Workflow Policy.
-
-
Click Save.
Configure the Mindray Server for Imprivata Authentication
See Mindray’s documentation or contact your Mindray representative for assistance with configuring on Mindray’s BeneVision Distributed Monitoring server for use with Imprivata authentication.
Philips Patient Monitoring System Integration
Add Philips Patient Monitoring System integration:
-
In the Imprivata Admin Console, go to Devices > Integrations.
-
In the Medical Devices section, click Add a medical device.
-
Select Philips Patient Monitoring System and click OK.
Configure Medical Device Workflows
This medical device integration requires full access to the Imprivata ProveID Web API:
-
In the Imprivata Admin Console, go to the gear icon > API Access.
-
On the API Access page, select Allow full API access via ProveID Web API and ProveID Embedded
-
Click Save.
Select the authentication method(s) available for medical devices:
-
In the Imprivata Admin Console, go to Users > Workflow Policy.
- In the section Medical Device workflows:
- Configure authentication methods required for the Log in workflow;
- Associate user policies with the workflow.
- For details on configuring workflows, see Configuring the Enterprise Access Management Workflow Policy.
-
Click Save.
This medical device integration can handle the following scenarios:
-
The EMR username and password are the same LDAP credentials as stored by Imprivata Enterprise Access Management (formerly Imprivata OneSign) (the EMR is in the same domain).
-
The EMR sits in a different domain, and therefore the EMR username and password are different from the Enterprise Access Management LDAP credentials.
-
An Imprivata APG profile is required to store the EMR credentials. The Welch Allyn device will retrieve these credentials from the Imprivata appliance once the user has successfully authenticated to the medical device using Enterprise Access Management, and will send those credentials to the EMR as the EMR identifier, along with the test vitals and other information.
-
For the Welch Allyn device to be able to retrieve the credentials from the Imprivata APG credential store, an application mapping is required in the Imprivata Admin Console. The external application name in this mapping must match the contents of the Welch Allyn field "Credentials App Id".
-
The credentials retrieved from the Imprivata APG credential store needs to be in simple username format. There is no need for complex formats such as user@domain or domain\username.
However, Welch Allyn should be capable of parsing out the correct format from whatever Imprivata APG has stored.
-
Enable API Access
This medical device integration requires full access to the Imprivata ProveID Web API:
-
In the Imprivata Admin Console, go to the gear icon > API Access.
-
On the API Access page, select Allow full API access via ProveID Web API and ProveID Embedded
-
Click Save.
Add the Welch Allyn integration:
-
In the Imprivata Admin Console, go to Devices > Integrations.
-
In the Medical Devices section, click Add an application.
-
Select Welch Allyn.
-
Click OK.
Select the authentication method(s) available for medical devices:
-
In the Imprivata Admin Console, go to Users > Workflow Policy.
- In the section Medical Device workflows:
- Configure authentication methods required for the Log in workflow;
- Associate user policies with the workflow.
- For details on configuring workflows, see Configuring the Enterprise Access Management Workflow Policy.
-
Click Save.
Enroll Authentication Methods for Medical Device Workflows
After a user policy is associated with a workflow, all users to which the user policy is assigned are allowed to enroll the specified authentication methods. If you have configured your medical device workflows to require authentication methods besides username and password, users must enroll the specified authentication methods before you complete your Enterprise Access Management integration. For complete details on the enrollment process, see Enrolling Authentication Methods for Imprivata Enterprise Access Management — MFA .
Password Only Authentication
Enterprise Access Management supports password only authentication to medical devices with no license necessary.
- In the Imprivata Admin Console, go to Users > Workflow Policy.
- In the section Medical Device workflows > Log in - password only, associate user policies with the workflow.
- Click Save.
Users associated with this workflow will not consume a Confirm ID for Medical Devices license. Users cannot be associated with any other medical device workflow.