MDM Integration: Samsung Knox Manage
NOTE: Applies to Android devices only. Supports Android and OTA Workflows.
Mobile Access Management supports MDM integration with Samsung Knox Manage.
Requirements
-
The Imprivata Locker Android app must be granted Lock Task permissions in the MDM. In Samsung Knox Manage, this is called Kiosk mode.
-
The Locker app must be added to the allowlist in your MDM.
Step 1: Configure Mobile Access Management
The integration of Mobile Access Management with Samsung Knox Manage requires that you configure the API Integration and Android Locker App.
-
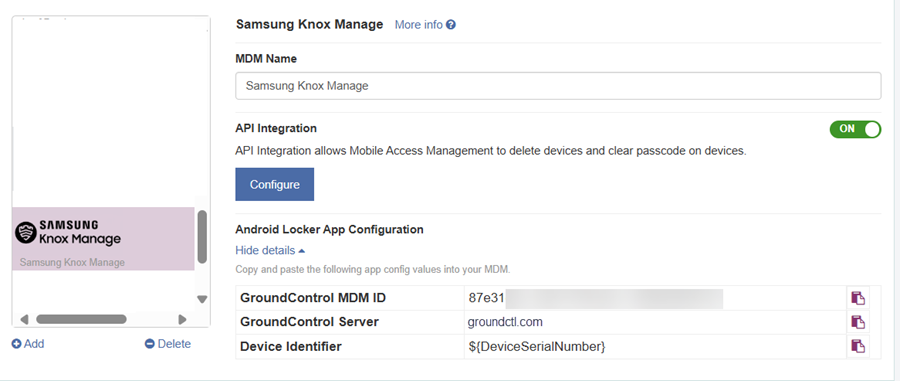
In the MAM console, go to Admin > MDMs. Click + Add, and select Knox Manage.
Click to enlarge
-
Switch the API Integration setting to ON. Click Configure.
-
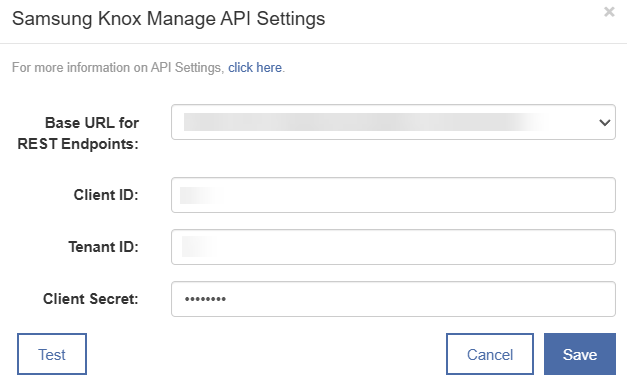
In the configuration dialog, add API settings that you obtained from the Samsung Knox Manage console.
Step 2: Set Up Samsung Knox Manage
To set up Knox Manage:
-
In the Knox Manage admin console, go to Group and create a user group for the Mobile Access Management users.
-
In Application, add applications, including the Imprivata Locker app for Android.
-
Assign the applications to the user group.
-
Set up the app configuration for the Imprivata Locker app:
-
Click Modify settings, then click Set Configuration.
-
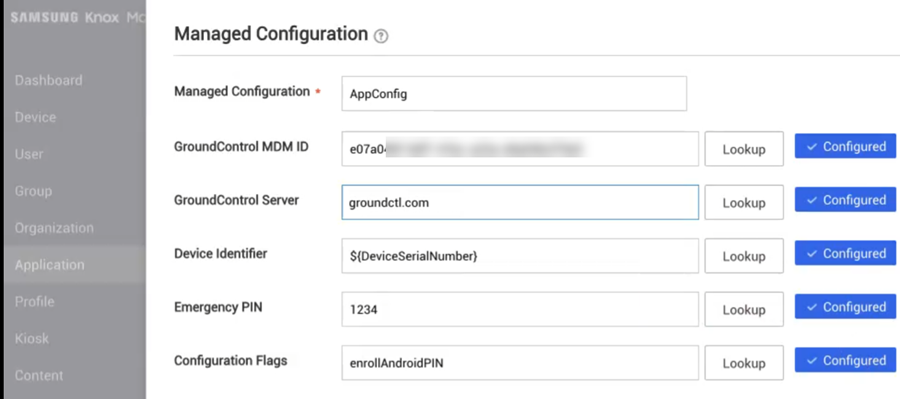
In the Managed Configuration box, type AppConfig. Enter the AppConfig values.
-
In the GroundControl MDM ID box, click Configure and type the GroundControl MDM ID.
-
In the GroundControl Server box, click Configure and type the GroundControl server.
-
In the Device Identifier box, click Configure and type the Device Identifier.
-
Optionally, in the Emergency PIN box, type the Emergency PIN.
-
Optionally, in the Configuration Flags box, type enrollAndroidPIN to allow the use of the native Android PIN.
-
-
Save the AppConfig settings.
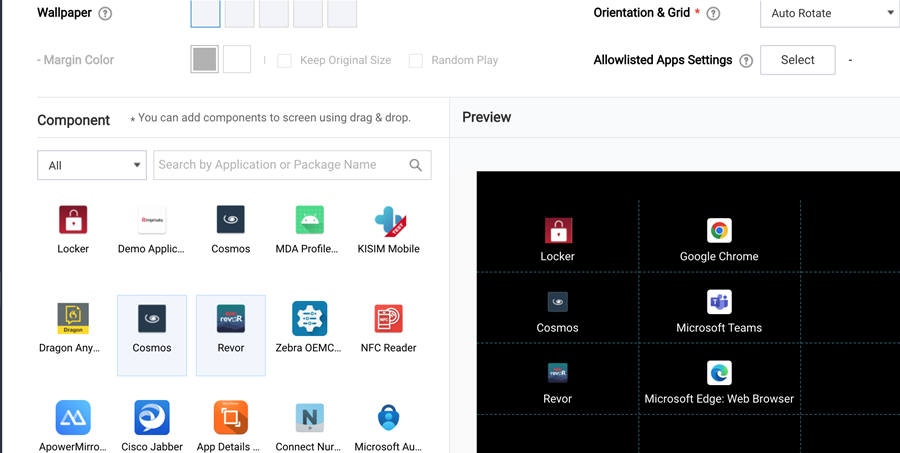
Step 3: Configure Kiosk Applications
In Knox Manage, specify a collection of approved apps, including the Imprivata Locker app.
-
In the Knox Manage admin console, go to main menu > Kiosk.
-
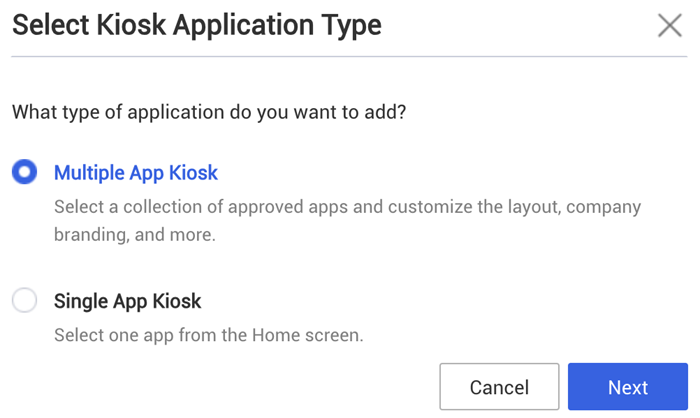
Select Multiple App Kiosk and click Next.
-
Add components to the screen, including the Imprivata Locker into the Preview pane.
Step 4: Enroll Devices
Knox Manage device enrollment begins with a factory reset of the device.
To enroll a device:
-
Wipe the device by using the full factory reset.
- Turn on the newly reset device.
-
On the Welcome screen, select your language.
-
Connect to the Wi-Fi, and then choose NEXT.
-
Accept the Google Terms and conditions, and then choose NEXT.
-
On the Google sign-in screen, enter afw#KnoxManage instead of a Gmail account, and then choose NEXT.
-
Complete the enrollment.