MDM Integration: Microsoft Intune
Imprivata Mobile Access Management has a deep integration with Microsoft Intune. The instructions below describe how to set up Mobile Access Management to use Microsoft Graph APIs. Optionally, you may add an Enrollment Profile for touch-free enrollments of non-DEP devices.
To configure the Imprivata Locker Android app with Intune's Managed Home Screen, see Configure Locker Android App and Microsoft Intune Managed Home Screen.
API Integration
Microsoft API Integration is recommended for both DEP and non-DEP enrollments. API integration adds additional features to customize your workflows, including device delete, device sync, clear passcode, and lost mode.
There is a one-time process to allow Mobile Access Management access to your Intune tenant. First, your Azure administrator must create a new App Registration within Azure. Then your Mobile Access Management administrator will add the Azure OAuth credentials to Mobile Access Management.
Determine the Permissions Model for the Authentication Method
Depending on your organization's needs, you can use one of the following permissions models as the authentication method for MAM.
-
Application permissions - Imprivata Locker runs in the background without a signed-in user. See Option 1: Application Permissions.
-
Resource Owner permissions - the authentication method for delegated permissions.
The resource owner authorizes Imprivata Locker to access the resource on its behalf. See Option 2: Resource Owner Permissions. Supported in MAM 7.2 and later.
Step 1: Microsoft Azure Setup
Configuration steps in Microsoft Azure and Microsoft Intune are provided to help guide you through the setup with MAM. Microsoft may change their interfaces at any time.
Always consult your Microsoft documentation for the latest admin console updates and paths to settings.
-
Log into your Microsoft Azure tenant at portal.azure.com.
-
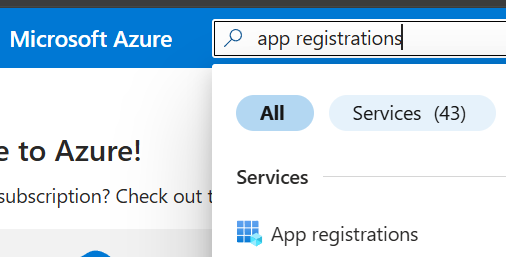
Search for the service App registrations.
Click to enlarge
-
Click + New registration to add a new registration. Name the application "MAM API Access" or something similar.

-
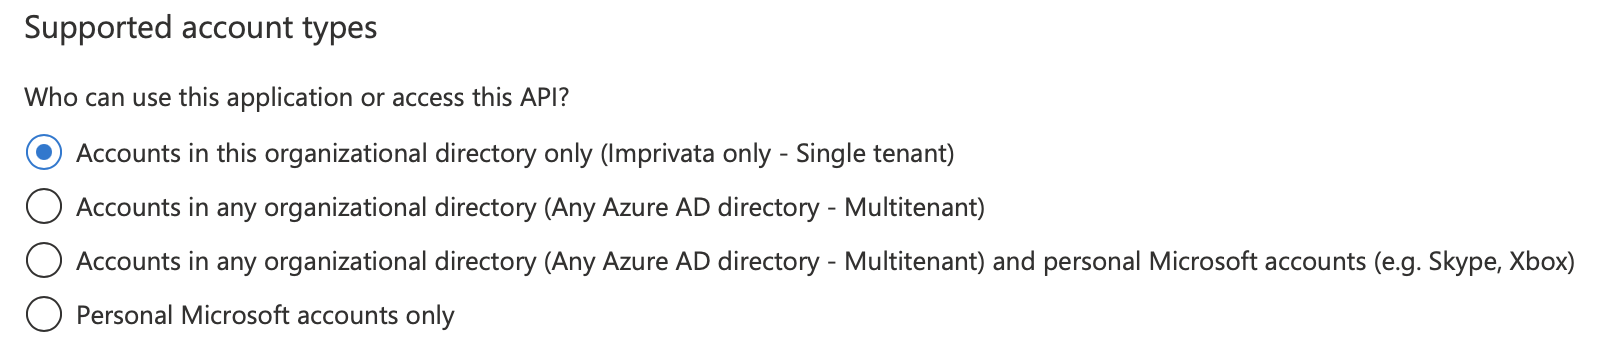
Choose Accounts in this organization directory only from the list of supported account types.
-
Leave the Redirect URI blank.
-
Click OK to create the application.
After registering a new application, you can find the Application (client) ID and Directory (tenant) ID from the overview menu option.
Copy both the Application (client) ID and the Directory (tenant) IDs to a safe place. You will use these in the MAM Admin console in a later step.

-
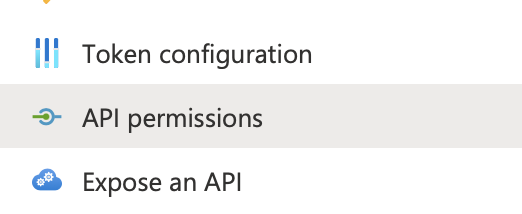
In the vertical navigation bar, select API permissions.
-
Select the Microsoft Graph API.

To use Application permissions:
-
Select Application permissions.

-
-
Device.ReadWrite.All,
-
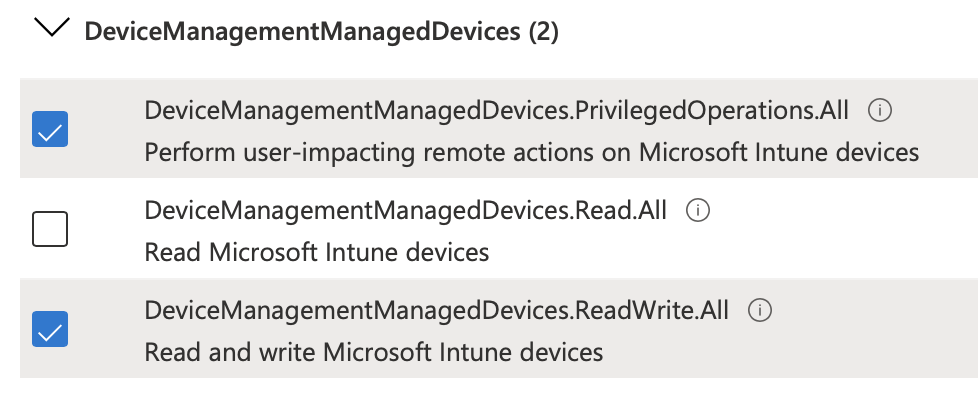
DeviceManagementManagedDevices.PrivilegedOperation.All
-
DeviceManagementManagedDevices.ReadWrite.All
-
DeviceManagementServiceConfig.ReadWrite.All
-
GroupMember.ReadWrite.All
-
If your environment utilizes Azure shared iOS devices, add User.Read as a Delegated Permission for authenticating to Microsoft apps. For more information, see Authenticate to Microsoft Apps on iOS devices with Mobile Access Management.
-
-
Click Add Permissions.
-
Grant permissions to the newly-created application. At the top of the permission list is an action Grant admin consent for <company name>.

-
Consent to allow the application to access your Intune managed devices.
-
In the vertical navigation bar, click Clients & Secrets.
-
Click New client secret.
-
Name the new secret with a meaningful description.
-
Select the expiration for the client secret. You may choose any value, but if it expires you must regenerate a new secret and load it into Mobile Access Management.
-
Add the new secret, copy the value, not the ID, and store it in a safe place. You will add the client secret value in the MAM Admin console in a later step.
-
You may now close Azure.
Requirements
Using Resource Owner permissions requires the following:
-
Microsoft Intune Plan 1 Device license.
-
Configure the following items in Intune:
-
Create a custom role assignment for the Policy and Profile Manager role.
-
Grant the custom role the appropriate sets of permissions to manage compliance policy, configuration profiles, Apple enrollment, Android Enterprise enrollment profiles and corporate device identifiers.
 Policy and Profile Manager Role - Permissions
Item Permission Android Enterprise Read Audit data Read Cloud attached devices View collections
View resource explorer
View timeline
View software updates
View scripts
Run script
View applications
Take application actions
View client details
Enroll Now
Corporate device identifiers Delete
Create
Read
Update
Device compliance policies View reports
Read
Assign
Device configurations Read
Delete
Assign
View Reports
Device enrollment managers Sync device
Create device
Update token
Update profile
Read device
Read profile
Read token
Assign profile
Enrollment time device membership assignment
Filters Read Managed devices View reports
Read
Set primary user
Delete
Update
Query
Mobile Threat Defense Read Operating System Recovery Configurations Assign Profiles
Create Profiles
Delete Profiles
Update Profiles
Read Profiles
Organization Read Remote Help app Take full control Remote tasks Wipe
Reset passcode
Retire
Enable lost mode
Set device name
Get filevault key.
Windows defender
Locate device
Initiate Configuration Manager action
Send custom notifications
Remote lock
Remove Device Firmware Configuration Interface Management.
Indicates remote device action to intiate Mobile Device Management (MDM) attestation if device is capable for it.
Clean PC
Shut down
Update cellular data plan
Run Remediation
Run Pause Configuration Refresh
Offer remote assistance
Manage shared device users
Disable lost mode
Rotate BitLockerKeys (preview)
Revoke App Licenses
Recover MDM Key
Rotate Local Admin Password
Bypass activation lock
Update device account
Play sound to locate lost devices
Reboot now
Sync devices.
Rotate filevault key.
Collect diagnostics
Change assignments
Offboard
-
Assign the custom role to a user.
NOTE:Take note of this user and its password. You will add the value in the MAM console in a later step
-
Use scope tags to ensure that your Intune admins have the correct access and visibility to the Locker app.
-
Add the scope tag to your token name in Enrollment program tokens (Devices | Enrollment > Enrollment program tokens).
-
Add the scope tag to the policies and profiles that you want admins to have access to.
-
Configure Resource Owner Permissions
To configure Resource Owner permissions:
-
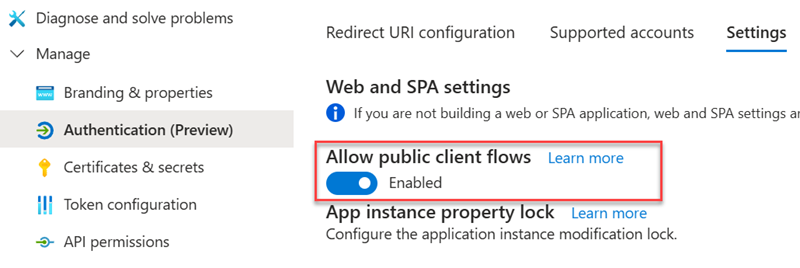
In Intune, go to the MAM API Access application, go to the Manage > Authentication menu.
In the Settings section, switch the Allow public client flows setting to Enabled.
-
Select Delegated permissions.
-
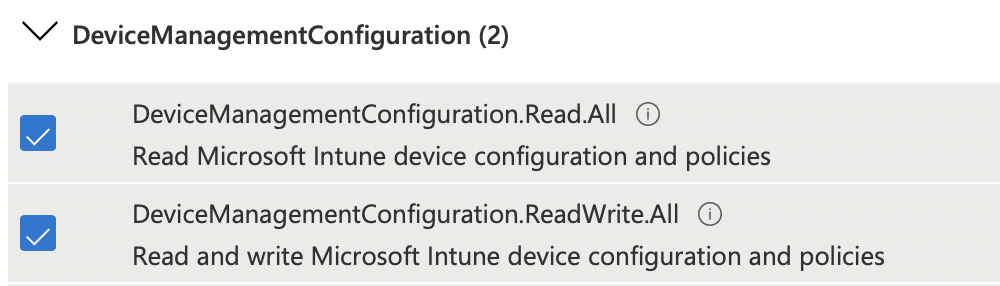
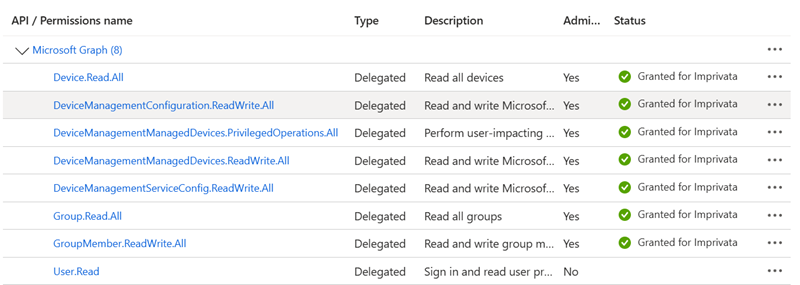
Add permissions for:
-
Device.Read.All
-
DeviceManagementConfiguration.ReadWrite.All
-
DeviceManagementManagedDevices.PrivilegedOperations.All
-
DeviceManagementManagedDevices.ReadWrite.All
-
DeviceManagementServiceConfig.ReadWrite.All
-
Group.Read.All
-
GroupMember.ReadWrite.All
-
User.Read
Click to enlarge
-
-
Click Add Permissions.
-
Grant permissions to the newly-created application. At the top of the permission list is an action Grant admin consent for <company name>.
-
Consent to allow the application to access your Intune managed devices.
-
Go to the Enterprise Application list select newly created app and add the Resource Owner account to the Users list.
Step 2: Mobile Access Management Setup
-
In the MAM console, go to Admin > MDMs.
-
To add a new MDM, click Add and select Intune.
-
Type a descriptive name in the MDM Name box.

-
Skip the enrollment profile.
-
Switch API Integration to ON and click Configure.
-
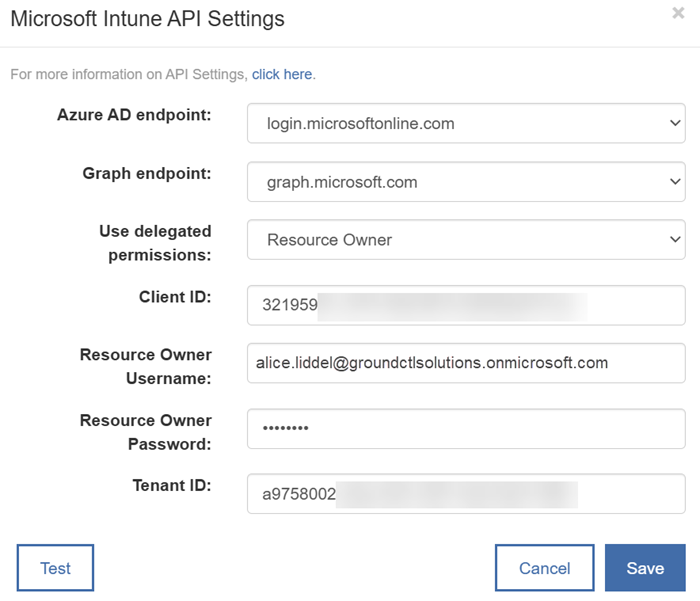
In the Microsoft Intune API dialog, configure the following information:
-
In the Use delegated permissions, select one of the options as the authentication method: Application or Resource Owner.
-
In the Client ID box, type the Client ID of your Azure environment. In Azure, this value is named Application (client) ID; you saved this value in an earlier step.
-
If Application is your authentication method for delegated permissions, in the Client Secret box, type the client secret you saved earlier.
-
If Resource Owner is your authentication method for delegated permissions, type the Resource Owner Username and Resource Owner Password.
-
-
In the Tenant ID box, type the tenant ID of your Azure environment. In Azure, this value is named Directory (tenant) ID; you saved this value in an earlier step.
-
-
Click Test to verify connectivity.